
Corn relish is as tasty as it is beautiful! It's bright, crisp, and bursting with summer fresh flavor!
It skips the heavy thickener that's added to the store-bought stuff, so it stays light and refreshing! It captures the cheerful colors of summer and the crunch of sweet corn, pepper, and onions in a wonderfully tangy, slightly salty vinegar and sugar syrup.
I love diving into food history and the origin of recipes, and it always makes me chuckle a little. How can corn relish be fundamental to Midwestern cuisine, Southern in origin, German, and created by the Pennsylvania Dutch all at the same time?
I think it's because everyone wants bragging rights on something so yummy!

Once you've made a batch of corn relish, what do you do with it? Great question! Corn relish can be down-home or uptown. One little jar of corn relish has endless possibilities!
It's considered a condiment, not a side dish, and makes a wonderful accompaniment for any meat or poultry. It's also terrific served with tortilla chips, or on soup and sandwich night. It tastes amazing on crab cakes, and is perfect for topping hot dogs!!

The United States was the first Western country to embrace the regular consumption of corn and has remained one of the world's largest corn producers and consumers.
Throughout much of Europe, corn was traditionally considered peasant food and reserved for livestock feed. Americans, meanwhile, cleverly pioneered many corn-based dishes and recipes, including corn relish. Lucky us, right?
Before you begin canning anything, make sure you have everything ready in your workspace: a long-handled spoon for stirring, a ladle, jars, rings, a canning funnel, a clean, damp cloth, and your jar lifter.
I like to put a thick old towel on my countertop to catch drips and pad the surface. Remember to check the depth of the pots you will use to treat the relish with a boiling water bath.*
We'll start making corn relish the same way we prepare corn for the freezer. When I was "putting up" corn this week, I saved 10 cups of blanched kernels to make relish!
Here's what you do in brief: Once you have removed the husks and silks from the corn, drop it briefly in boiling water, a few ears at a time. Allow it to cook for 7-11 minutes.
Then, remove the ears and place them in very cold water to stop the cooking process. When the corn is cool enough to handle, cut the kernels off the cob and set the corn aside while you chop the other veggies.

Of course, you can also blanch just enough corn for this recipe. An average of 15-20 ears of corn yields 10 cups. If you blanch too much, you get to eat it! Yay! It's so sweet and crunchy!
I like to saute extra or leftover corn in a little butter, then add kosher salt, fresh cracked pepper, and some finely chopped green onion. Yum!
Next, chop up some peppers; the more colorful they are, the better! I used only orange and red peppers this year because they are sweeter and more digestible, and I wanted to add vibrant color! Mom was right, we eat with our eyes!

You'll also need to chop some celery and onions.
Before you go further, fill a canner or tall stockpot about half full of water. *Check to be sure the pot you use is tall enough to allow boiling water to cover the jar with the lid on by one inch for a proper seal.
If your water is hard, add vinegar to prevent lime from forming on the jars. For this batch, my daughter and I used two tall stockpots for the water bath. Each held five wide-mouth pint jars snugly!
Now that everything has been shucked, blanched, seeded, and chopped, it's time to bring it all together in a big, heavy pot! We used my big blue Le Creuset Dutch Oven; it worked beautifully! The pot you use should hold at least six to eight quarts.

Begin by combining the vinegar, sugar, canning salt, celery seed, mustard, and turmeric. Slowly bring to a boil, occasionally stirring until the sugar and salt are completely dissolved.
Add the onion, peppers, corn, and celery, and heat on medium-high until the mixture boils. Then turn down the heat and cook gently, uncovered, for five minutes while you line up your jars, flats, screw-on rings, jar lifter, and a clean, damp dishcloth.
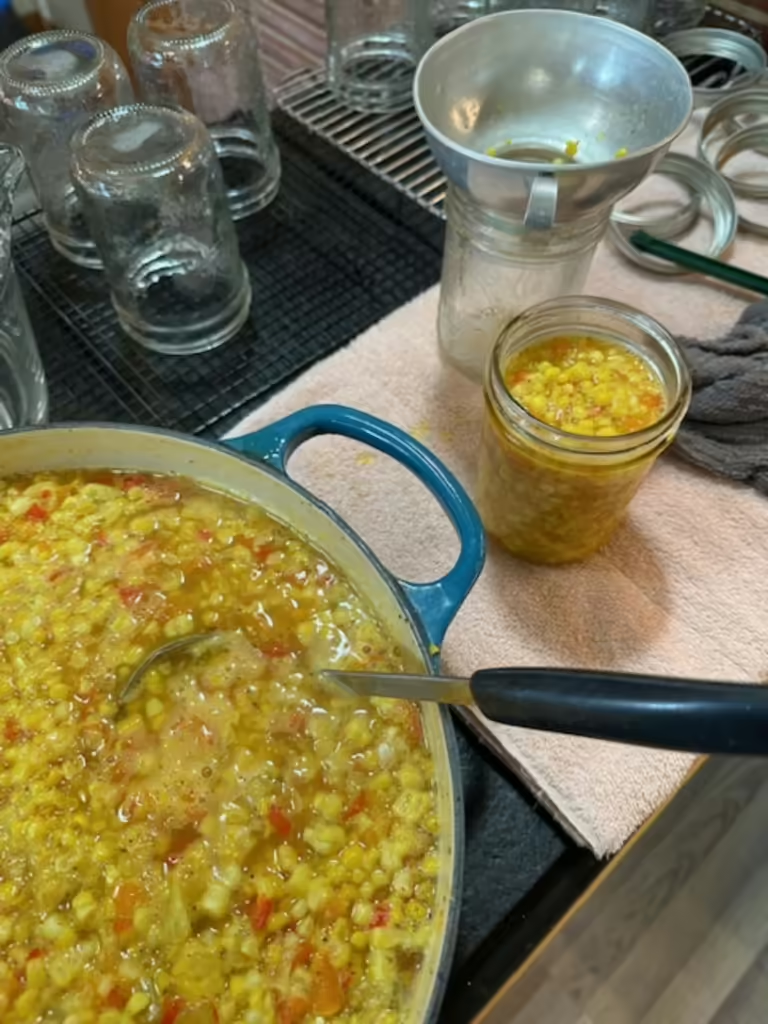
Remove the pot from the heat and ladle the relish into clean pint jars. Leave 1/2 inch headspace. Carefully wipe the rim of the jar with a clean, damp dishcloth. Apply a canning flat and ring, screw into place, and hand-tighten the lids.
Use the canning jar lifter to lower the hot jars into the boiling water bath. If needed, add boiling water to cover the jars by one inch! Process for 20 minutes in the boiling water bath. Turn off the heat.
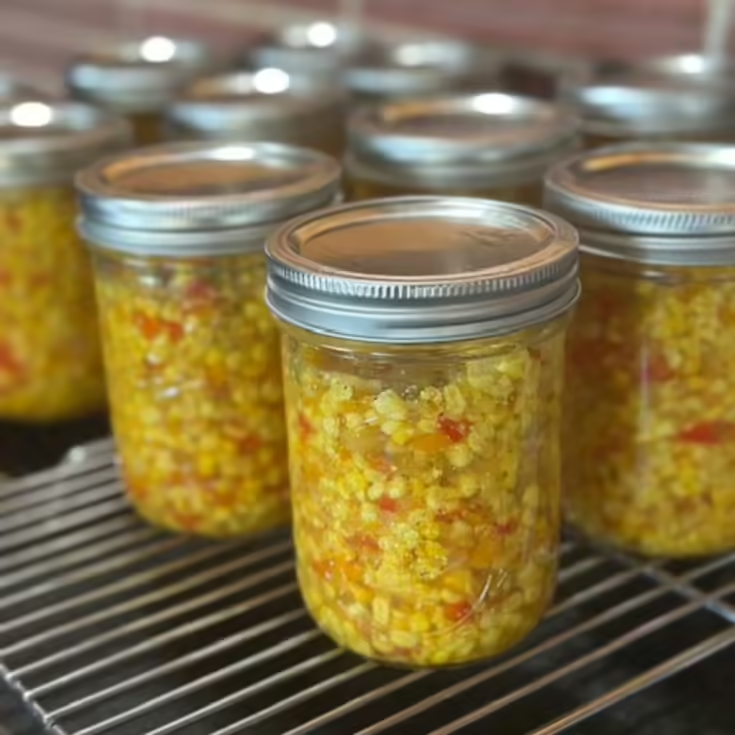
Use the jar lifter to remove the jars from the water bath onto a cooling rack or thick towel on the countertop. Leave an inch between the jars and let them cool completely before you touch them. As they seal, you will hear the satisfying "ping" of the lids as they form a tight vacuum seal.

If a jar doesn't seal, you can remove the lid, wipe the rim, try a new lid, and reprocess. Or refrigerate the jar and use the relish within about two weeks!
Corn relish makes a wonderful gift. Kids love it because it's not too spicy! Why not make an extra batch so you have plenty to share? Hint: include a bag of tortilla chips or a package of brats and buns for the hostess at your next "5th quarter" get-together!
Corn relish captures the cheerful colors of summer and the crunch of fresh celery, peppers, onion, and corn in a wonderfully tangy, slightly salty vinegar and sugar syrup.
Corn is one of summer's most wonderful gifts, and while it's abundant, we eat as much as we can, as often as we can! Here's the slickest way to cook corn on the cob in your microwave and ditch the pesky silks!
Here are two recipes using corn that we love: Sweet Corn Salad and Corn Fritters. Here's how to freeze corn for winter enjoyment. It tastes freshly picked!
If you liked this homemade corn relish recipe, you're my people! If you did, please share it on your social media accounts, such as Facebook, Instagram, Pinterest, and Twitter! It would sure tickle me, and I would be ever so grateful!
If you haven't already, please look for me on Facebook and Pinterest, where I will share easy, delicious, family-friendly recipes every week!
If you enjoyed a post, I'd love it if you would leave a ⭐⭐⭐⭐⭐ review or a comment. It really helps my little business. ❤❤
🐝 My Bee-Attitude for Today: Bee Grateful – “Summer’s bounty won’t last forever. Fill your basket, fill your freezer, and fill your heart while the sun still lingers.”
Sign up for my newsletter and receive a free gift! A printable sign that would look great in your kitchen, framed above your sink, or just placed anywhere to remind us how lucky we are to have dirty dishes!
 Sign up now!