
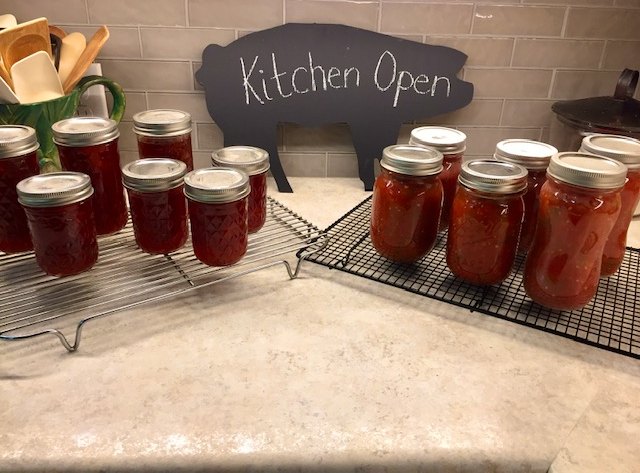
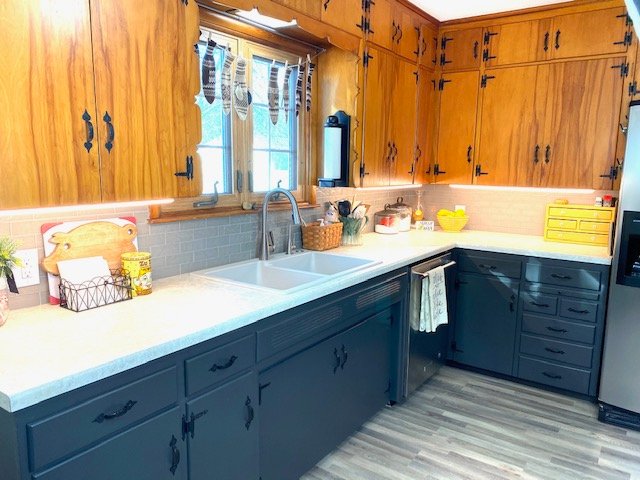
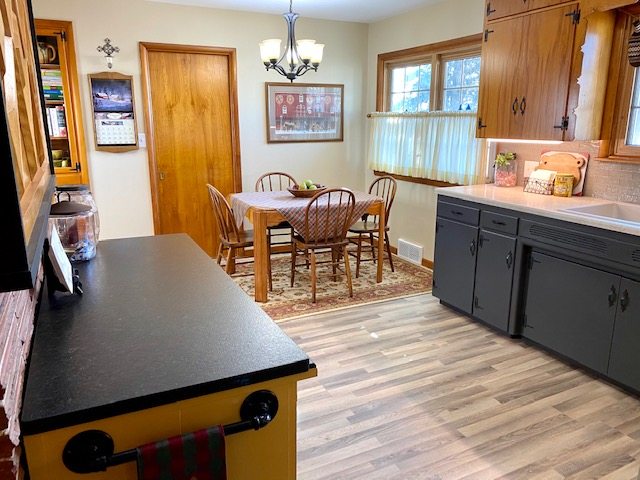
But it wasn't quite done. Just days before Christmas, my nice deep (and big!) sink, the counter top and the back splash were installed. I went right to work making Christmas gifts of strawberry-rhubarb jam and salsa. I was so excited to have slim little LED light strips installed under all the cabinets! And YES, especially over the stove so I can actually see what I'm doing!! I snatched up the metal pig at a flea market years ago knowing he'd find a home somewhere with me. I painted him with chalkboard paint and announced we were open for business!!
I picked a simple Formica counter called Perla Piazza. It has very little design but a hint of luster and I chose a plain grey glass back splash. Again, it has very little pattern. The floor has a lot of contrast, there's a very large wall made of a unique retro brick and the upper cabinets are hardwood with very dominant graining. I think they're birch because birch wood was so popular at the time the house was built but no one can tell me for sure! Anyhow, we had plenty of pattern going on already so I stayed plain Jane.
I forgot to mention that we did stain some of the new wood in a couple of places. Once again, our friends at Sherwin Williams deserve a hand because they can do an excellent job of matching stain to the original woodwork. You'll see more in the rest of the pictures. We used a clear polyurethane to seal over the stain.
We started back to work on the upper cabinet doors after Christmas. We simply had to take a break and come up for air before the final push. We did a section at a time in Papa's shop so it wasn't so overwhelming and I have to admit I sort of forgot to take a lot of pictures of that process. Sorry! It was a daunting number of little doors and little screws to deal with again!
We were hesitant to try refinishing the upper cabinets because the surfaces were in pretty tough shape, especially around the handles and we did not want to strip them clear to the bare wood. And, we knew if it didn't work we could fall back on painting them. So, after a lot of research on what methods and products to use, we found Polyshades by Minwax and it worked great!
Be sure to read all you can about how to prep your cabinets before you begin but we cleaned ours with acetone and sanded them first with a sanding sponge and then a finer sand paper. Polyshades is stain and finish in one and we got a good match. It took two coats, sanding after each coat and it dried very slowly, trying my jack rabbit brain and little patience. Thank goodness Papa is more patient than I am. While not perfect, (what is in a sixty five year old house?) we think they turned out very well.
I thought so! The kitchen faces south and has abundant natural light in most areas on a sunny day especially in the winter. What I love most is the kitchen kept the warmth and quirky charm of a house built in the 1950's. It's so much easier to work in and it's no longer what one friend so aptly called it, "A one cook kitchen." Now it's fun to have people join me to hang out while I cook!
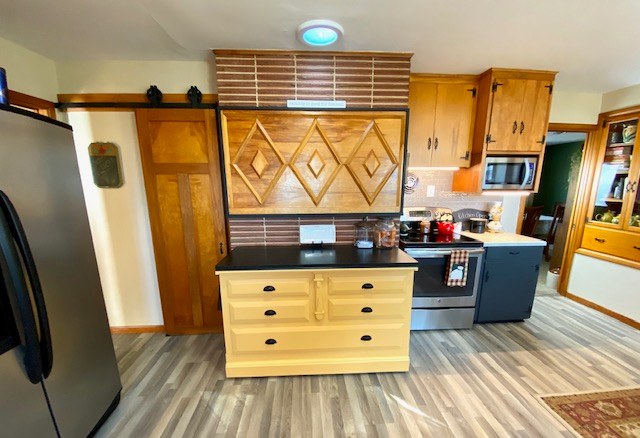
My happy yellow island usually sits along the brick wall under what we've come to call "the diamond board." Remember when I said to notice the panel on the back side of the peninsula we removed? The whole thing came off in one piece and with minor trimming and a narrow frame painted in Sherwin Williams Tricorn Black, it fits on the funky brick wall perfectly. I can't think of a piece of art that would tie things together better! I almost painted the brick but decided to live with it first because I can't "unpaint" it. What do you think?
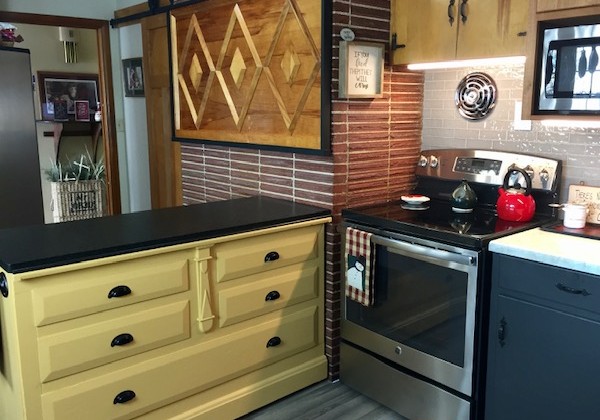
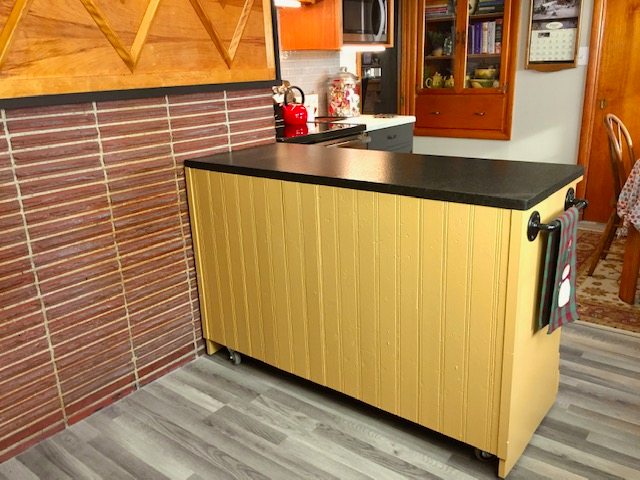
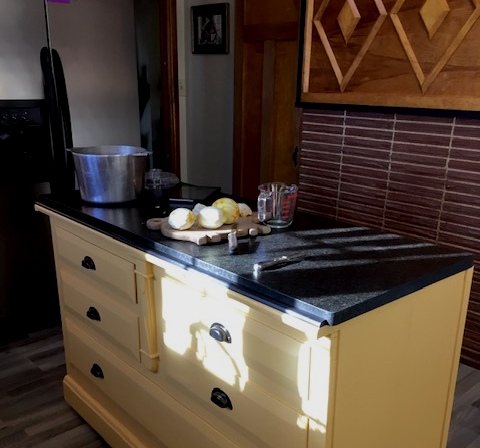
The heavy casters with rubbery wheels glide anywhere I want to use my island. In the top two pictures I was ready to cook jam so I angled it by the stove. In the bottom picture I rolled it into the middle of the room close to the sink while I prepped fruit for marmalade.
The roomy deep drawers are perfect for lids, cookie sheets, tea towels, hot pads, cooling racks and anything else I need to stash! Have I mentioned I love this thing!!?? By the way, my friend Kim thinks I should name my island. Any ideas?
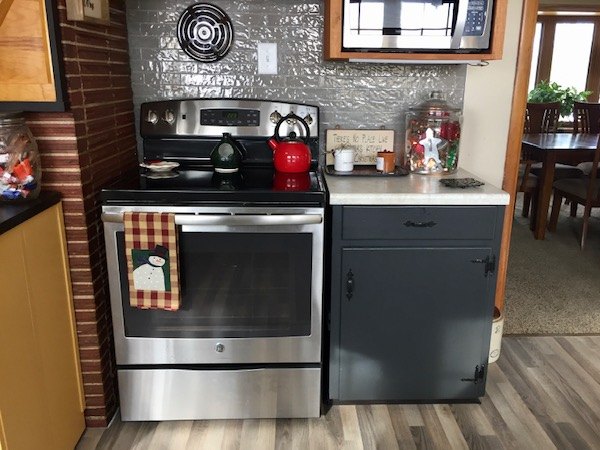
I'm so smitten with "Torchlight" that I used what I had left to paint the little drawers that serve as my "Fibber McGee and Molly" catch-all. For all of you under 50, that was a popular radio show about the time the house was built. I wanted an under mount stainless steel sink but found I could save big bucks by doing this drop in composite sink instead and now I'm in love with it!! One side is quite a bit bigger than the other, large enough for a full size cookie sheet or roaster and it's awesome!!
The drawer and door on the far left were rescued and rebuilt from the peninsula. And I'm thrilled with what the under cabinet lighting has done for the workspace.
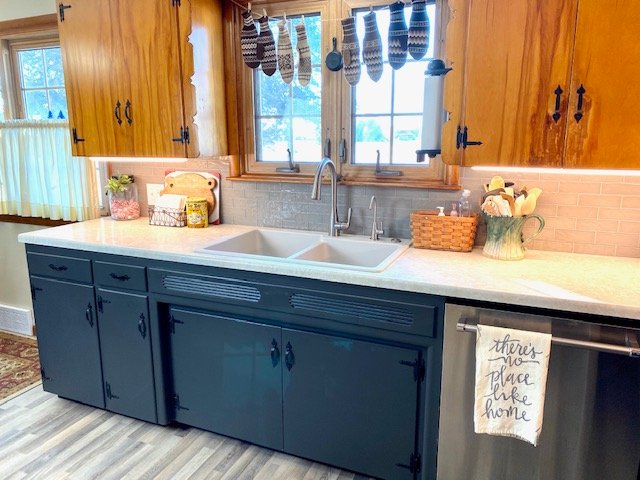
I included this so you can see we kept the funny little trim on either side of the window and the old vents under the kitchen sink. The switch for the garbage disposal was inside the right lower cabinet door, something I never got used to in eight years! I'm tickled with the much less messy air switch right on the sink. Little things!
You're looking at one of six pocket doors in this quadrant of our house. That one goes out to the laundry area, three-quarter bath and "back door", the one almost everyone uses. We did a lot of work in that part of the house, too, and I'm just as delighted with how it turned out.
I have the great privilege of cooking once a week or so for our grandkids who will graduate in the spring. Most of the time there are buddies who come along. It's so nice so see them gathered around that old table of mine, a little less squished. Makes my heart smile.
I hope you enjoyed my story and found a thing or two that makes you think. But I'm telling you, the food doesn't taste any better now than it did in my old kitchen and there's no more love being stirred into everything I make today. It is nicer to work in and I'm glad we did it but "stuff" alone will never make us happy.
Creativity grows best when resources are limited because it makes us look at things differently. When we change the way we look at things, the things we look at change. Never underestimate what you can do with what you have.
Figuring things out is a very satisfying feeling and you are much more clever than you think you are! There's almost always a new approach you can consider. Be original! Create what makes your eyes happy and your heart smile.
Waiting for something is very unpopular today. I admit I'm often very impatient. We want what we want and we want it now. Sadly, that can often lead to overspending and hasty choices we regret later because we don't take time to think things through. Take as much time as you need. Eight years was way too long but I'm telling you, it's crazy. A lot of my best ideas didn't bubble up for a very long time!
Finally, simple is almost always best. In our endless race to have everything we think we need, we fail to appreciate all the riches we already have. Sending love! Cant wait to hear some of your stories!
Sign up for my newsletter and receive a free gift! A printable sign that would look great in your kitchen, framed above your sink, or just placed anywhere to remind us how lucky we are to have dirty dishes!
 Sign up now!
I can't tell you how much I love this! I"m not sure where I missed in 'liking' your GB's Kitchen page but I'm happy I found it! Very nicely done and very inspiring...my husband should be scared...LOL
Send Huggs!
Kristin
Thank you!! It was a lot of hard dirty work in an old house but we are so happy with the results! Glad to know you! What state do you live in?
This story! Your kitchen! Such a unique workspace for pouring love into all you create! Thank you for all the details and decisions made. I screen-shorted your quote about limited resources making us make more creative decisions…the wisdom in those words is absolutely priceless!