
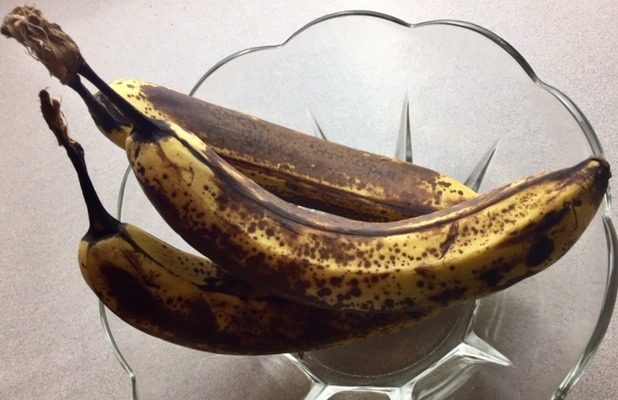
Banana cake, and double layer to boot! What made me decide to make an elaborate banana cake? Bananas, too ripe to eat.
I absolutely love to cook. But let's be honest. After cranking out meals for almost 50 years I rarely use a recipe. Like, never. So when I create a post for y'all, the hardest part is capturing measurements and writing them all down. Most days, I just look in the cupboard, look in the fridge and start swinging. In my natural habitat, I'm a freewheeler. I cook with reckless abandon. Remember the Swedish Chef from Sesame Street? Yep, that's me.
Ok, but baking is not like cooking. Baking requires measuring, organization and following directions. Well, except for cinnamon rolls and pies, which just come together by feel. Not layer cakes! Layer cakes take discipline and some effort.
We're living in interesting times. Right now, most of us have fewer places to go and more time to try out new things. So, I studied those three bananas and thought, what's something new and different I could do with you guys?
This is my cookbook cupboard. What you can't see is it's two layers deep. Some of the volumes are from the 1930s, '40s. and '50s. Like friends. Over the years, I'd get one out to keep me company while I ate breakfast. I pored over them as if they were textbooks. That's how I learned how to cook! By osmosis!
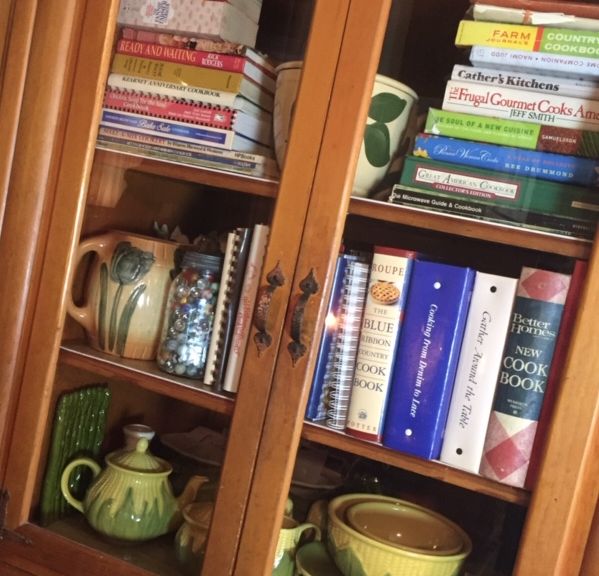
I spent an entire evening looking through some of my old favorites to find any banana cake recipe that held any promise. And then, I created my own. Yep, with actual measurements and directions! And I baked two layers.

This time, I decided I would do everything from scratch with no calories barred. I'd make it a labor of love and I enjoyed every bit of it. Truth be told, I'm still working so I made this cake in three sessions, one each evening. I made the recipe and step by step directions very detailed for you. It would be a good idea to start there because you might want to do it in one day.😉
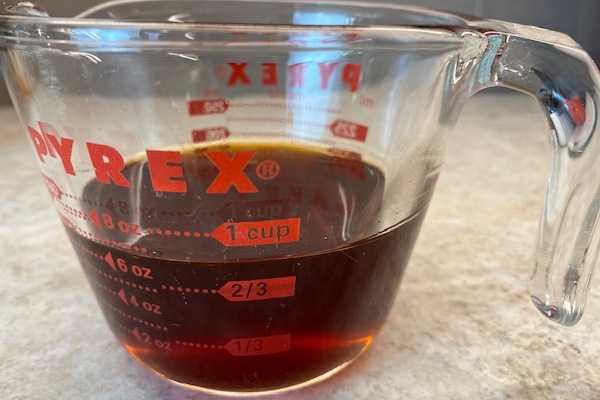
This part is fun. Part cooking, part science experiment. You start by melting plain old white sugar in a heavy pan until it's a beautiful golden tan and then pour boiling water in it gradually and stir it until it's all dissolved into a gorgeous syrup that tastes like caramel. Put it in a jar and set it aside. It needs to cool.
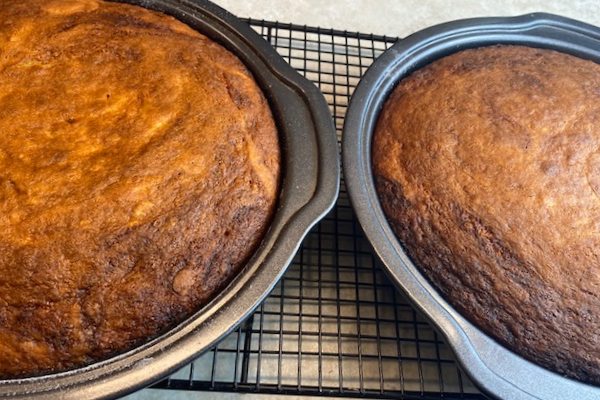
It's time to mix up the cake batter, put it in two 9" layer pans and bake it.
While it bakes, make the incredibly yummy vanilla pudding. Follow the directions and you'll be golden! Be sure to lick the pan while it's warm. It's your birthright! Before you put the layers together, the pudding needs to cool so wash your pans or take a catnap. I vote for the catnap.
I didn't take pictures of making the frosting because it's pretty basic. It does make a nice big, fluffy batch so you can lavish it thickly on the cake. I did lick the beaters. Don't miss that step.
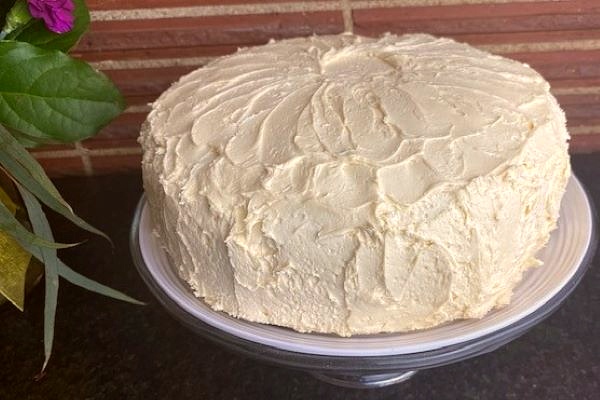
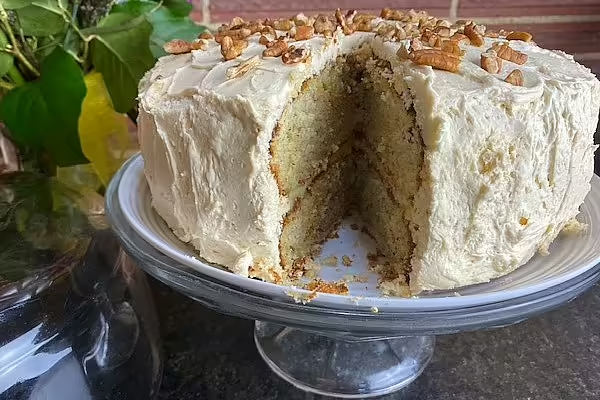
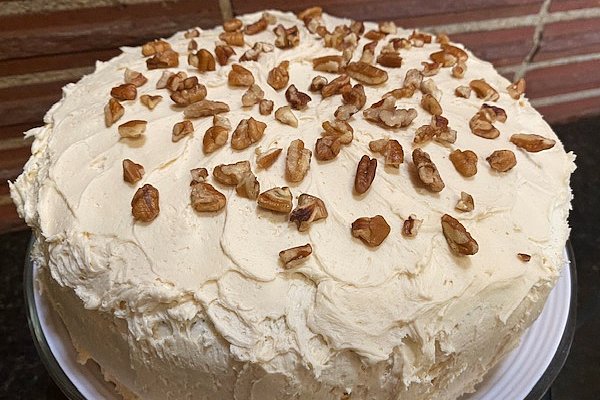
Once I applied the frosting, I thought the cake looked sort of, well, naked. Not festive. A cake this naughty needed some flair so I sprinkled some pecan pieces on top. In hindsight, I should have toasted them. Toast yours.
See? All better.
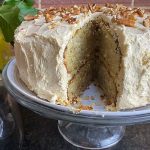
A showy double layer cake that's moist and tender, exploding with banana flavor. Homemade vanilla pudding nestles between the layers and it's lavished with thick burnt sugar buttercream icing and topped with a sprinkle of chopped pecans. Definitely a labor of love.
Pre-heat oven to 350 degrees. Thoroughly grease and flour two 9" x 1 1/2" round cake pans. Cream together shortening and sugar until fluffy then add eggs, vanilla and yogurt. Gradually add dry ingredients and mix on medium speed about three minutes or until well blended. Pour evenly into two pans and bake 35-40 minutes or until toothpick or cake tester comes out clean.
Cool cakes on rack until barely warm, Run a narrow spatula along the edge, then invert onto separate plates and let cool completely.
Cover and set aside until ready to assemble.
Beat egg yolks in a small bowl and set aside.
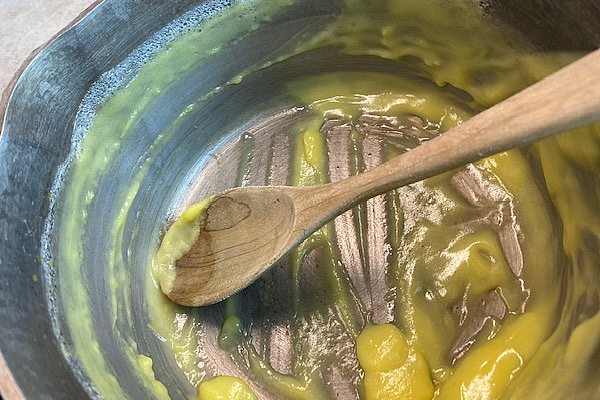
Combine sugar and cornstarch in a heavy duty metal saucepan. Add milk or half and half and cook on medium heat, whisking continually until it thickens and begins to boil gently.
Continue to cook and whisk for two minutes then remove from heat. Now you'll gradually ladle about a cup of the hot mixture into the beaten eggs while whisking continually.
Then SLOWLY pour the egg mixture back into the pan, whisking as you pour and cook for another two minutes. Remove the pan from heat and stir in butter and vanilla. Pour into a bowl and press plastic wrap directly on the surface to keep a film from forming.
If you got in a hurry and you've got bits of cooked egg in the pudding, never fear. While pudding is still warm, press it through a strainer and bam! Problem solved.
Cool pudding completely before filling cake layers. Goody goody you won't need all the pudding for the cake so indulge yourself in the leftovers! Heavenly!!
This is part cooking, part science experiment and it's so cool to watch!! Start some water boiling in a tea kettle or small pan as you begin. It will evaporate as it boils, so start with about 1 1/2 cups of water. Put sugar in a heavy duty metal saucepan on medium heat. A wooden spoon works great for stirring it. After about 5 minutes the sugar begins to melt and starts to turn a beautiful golden brown.
Lumps will form as it melts, Use your spoon to smash them! Once all the lumps are gone, the whole pan of sugar will be melted to a gorgeous suntan brown. This can take 8-10 minutes. Now measure out 3/4 cup of the boiling water into a heatproof glass measuring cup.
S-l-o-w-l-y drizzle it into the melted sugar. BE CAREFUL because it will hiss and spit when you do. Once you'e put all the water in, keeping cooking and stirring for another three minutes or so until all the sugar is dissolved.
Now pour it into a glass jar with a lid and let it cool. It will get thicker as it cools.
Yay! This makes about a cup of syrup, enough for two batches of frosting and it keeps well in the fridge! (Believe me you'll be glad you have it ready because you'll want to make this cake again!)
I used a stand mixer but you can use a hand mixer and a large bowl. Beat the butter until it's creamy then add burnt sugar syrup, vanilla and milk or cream. Mix til everything is worked in then turn mixer up to high and beat another two minutes or so. You may need to add a little powdered sugar or a little milk or cream to get it to the right consistency for spreading. Don't be afraid to add a little more salt if you like- maybe another 1/4 teaspoon. The sweet/salty thing works great on this cake!
Cooled cake, cooled pudding and freshly made frosting all gathered. Ready, set, go. Hint: I put three narrowish strips of wax paper on the plate forming an open triangle before I put the bottom layer down. I'm not a frosting pro so this lets me pull out the strips after I'm done so the plate is magically clean and free of frosting fall out.
Put cooled pudding on the bottom layer stopping just before you get to the edge. Set aside any extra pudding to eat later! Set the top layer on and nestle it into place.
Using a long narrow spatula, begin frosting the sides of the cake, starting along the pudding line and continue until the sides are covered. Now frost the top, This is a generous amount of frosting and you'll be glad because it's amazing.
I thought the cake looked a little naked so I added a sprinkle of pecan pieces. Toasted coconut would be a wonderful garnish, too.
This cake should be refrigerated but set it out a little bit before you serve it because it tastes best at room temperature.
Papa thinks this might be the best cake he ever ate and that made me happy. I shared it with a few close peeps who loved it too. For my people who love to mess around in the kitchen, this one is well worth the effort. It would make a fantastic cake for a special occasion like a family birthday.
Some of us unwind by cooking or baking but I'm the first one to tell you I know it's isn't everyone's idea of fun. That's ok, we all have our own happy place and goodness knows we need to spend time in ours these days. Want to use up those bananas without a lot of fuss? Here's a recipe for the best banana bread I've ever eaten, courtesy of our daughter Beckie.
Do you have a favorite recipe for using up those overripe bananas? Would you share it with me?
Sending ((air hugs)) from GB's kitchen, on the north edge of a middle size town in the middle of Nebraska, in the middle of our United States. Stay safe, stay together. Say your prayers, wash your hands and I'll see you soon.
Love, GB (Betty Streff)
Sign up for my newsletter and receive a free gift! A printable sign that would look great in your kitchen, framed above your sink, or just placed anywhere to remind us how lucky we are to have dirty dishes!
 Sign up now!
Betty, I almost never buy shortening. Is butter ok? Or should I wait until I can get to the store?
Guess what! Today I find myself in the same boat because of a delayed grocery pick up so I googled a favorite source.
“Butter or margarine can be used but add 2 Tbsp per cup of shortening and be sure to cream it well”
I’m gonna do it! I have some margarine on hand that I’ll use up today!
Testing my 9x13 hypothesis!! 🙂
This cake looks so decadent and yummy! I love that every part of this recipe is made from scratch. That is the way I love to cook. And yes, I lick the beaters and clean the bowl too!!
Yay us!! You and I are so much alike. We both have a Grumpy who we adore and we both find our happy place feeding the people we love. ❤
Hi, In the directions for the frosting you didn't say when to add the powdered sugar but then added "you may need to add some powdered sugar". Did the directions mean to say to add the 4 cups of powdered sugar with the rest of the ingredients and then add more if needed? Thanks, Mike
Hi Mike! Thanks for thinking about making this cake, it's amazing! I would add the powdered sugar gradually when making the frosting. Humidity and moisture content in the butter can make a difference. If you have added all the powdered sugar and it's not quite to the spreading consistency you want, add a bit more powdered sugar. If you reach a nice spreading consistency before all the powdered sugar has been added, stop! 🙂 If you get it too stiff, you can add SMALL amounts of cream or milk until you make it "just right", as Goldilocks would say!