
If you learn just one bread recipe, make it this one. This easy homemade yeast dough recipe is soft, versatile, and practically foolproof. With it, you can bake tender loaves of bread, pillowy dinner rolls, golden breadsticks, gooey cinnamon rolls, and even hearty Runzas — all from the same basic dough.
Baking yeast bread doesn’t have to be intimidating. In fact, it’s one of the most budget-friendly, comforting kitchen projects you can master. With just a handful of pantry staples — flour, water, yeast, salt, sugar, and butter or oil — you can turn out bakery-quality bread in your own kitchen.
Once you’ve made this dough a few times, you won’t even need to measure the flour. Your hands will know when the dough feels “just right,” and the dough itself will show you when it’s ready. Bread baking should be a soothing, satisfying ritual — one that fills your home with comfort, and your kitchen with warmth, and wonderful smells!
💛 Beginner Tip: If your first batch doesn’t turn out perfectly, don’t worry. Yeast dough is forgiving and inexpensive, and every loaf you bake will make you more confident.
Not up to trying yeast bread today, but still want to fill your home with the incredible smell of something wonderful baking in the oven? Here are my two top quickbread recipes!
One Bowl Rustic Rhubarb Bread- A delicious rustic rhubarb bread made with fresh or frozen rhubarb. Not too sweet, but slightly tangy. No mixer, one bowl. Tender and moist, lovely crumb.
Best Blue-Ribbon Banana Bread- A tender, moist banana quickbread with a hint of nutmeg and vanilla, then topped with cinnamon sugar.
I am all about making yeast bread as simply as possible. That way, you'll want to make it often and with confidence. You can read yourself crazy looking at all the well-meaning advice online, so today, let's stay very basic.
The single most important rule for making yeast dough is to keep the water at a temperature that's neither too hot nor too cold. The ideal temperature for water is about 100 to 110. The perfect temperature for a hot tub is 100 to 102 degrees Fahrenheit. That's a good guideline.
"The wrist test" is the next best thing to a thermometer. The yeast will probably like it if the water feels comfy and warm, not too cool or too warm on your wrist. If you ever gave a baby her 3:00 AM feeding, you tested the temperature of the baby's bottle the same way! Yeast and wee babies like the same temperature range!
The other single most important thing (Can there be two? Yes.) Yeast can expire. Check the date on the packet or jar, and if in doubt, proof the yeast before you proceed.
To proof yeast, put some yeast and a little sugar in warm water, again about 100 to 110 degrees, and let it sit for a few minutes. If it gets foamy and creamy looking, you know the yeast is active and viable for baking.
Yeast bread needs warm water and a bit of sugar to activate. There are two kinds of yeast: regular and quick-rise yeast. I prefer to use rapid-rise or "instant" yeast because it saves a step and is about 10 minutes faster. The primary difference is that rapid-rise yeast is processed to produce finer granules, so you can add it right along with the flour, water, and sugar without needing to "proof" it first.
If you want to become a serious yeast bread baker, here's more in-depth information about yeast from the smartest food bloggers I know, The Spruce Eats.
I bake yeast bread a lot, so I buy yeast in bulk. I store it in the freezer until I open it, then put some in a tightly sealed jar in the refrigerator. Yeast kept in the freezer lasts indefinitely.
If you have old yeast packets stashed in a cupboard somewhere, check the expiration date before launching a batch of bread. If in doubt, proof it as described in the link above; if it flops, replace it.
If your yeast is dead, it's gone; you must give it a funeral down the drain and buy some new yeast.
In your large stand mixer, make the dough. Option B: You can do this by hand, kneading the dough. Feel virtuous, and build up your arm strength and definition.
These days, I use my Kitchen Aid stand mixer to make bread or rolls because it does a great job of mixing and kneading the dough. For the first 30 years I baked yeast bread, I mixed and kneaded the dough by hand. You can, too, but the mixer makes it faster and easier! But maybe that explains my arms today. Sigh.
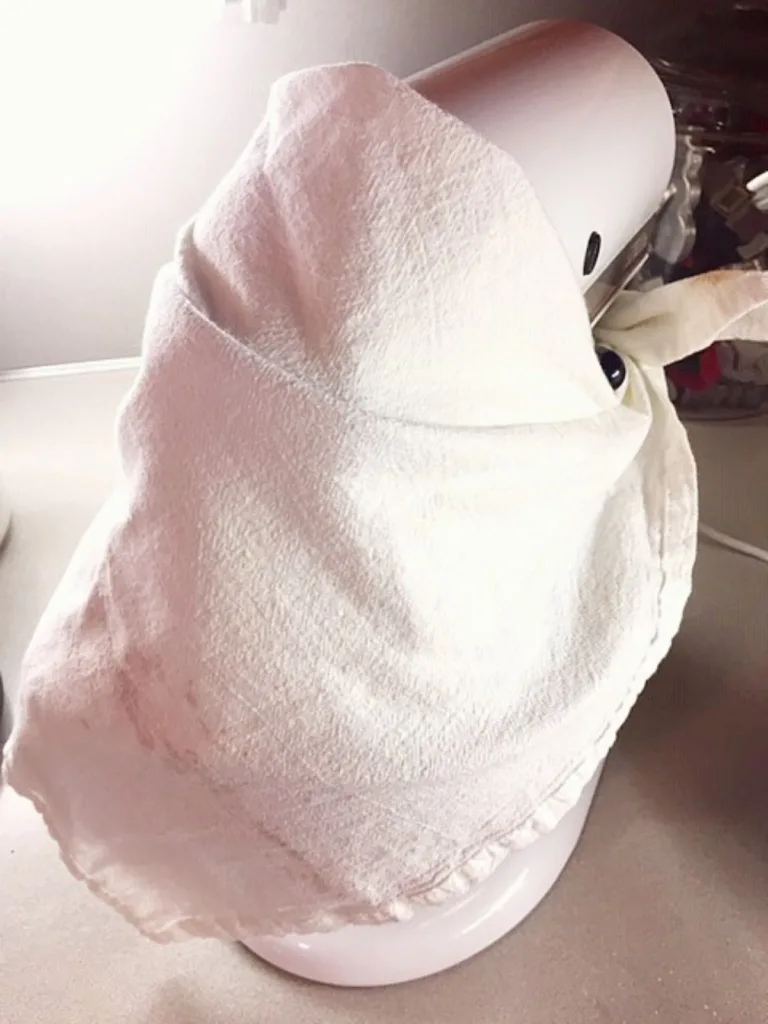
I have the best hint for making bread dough in a stand mixer: Drape a clean dish towel over the mixer head and bowl when you add flour; it saves a lot of mess and cleanup.
My second-best hint: Use a large, clean paintbrush to sweep runaway flour off the mixer and counter into the trash or sink before you start the soap-and-water cleanup. Less pasty mess, less time. I admit it. I'm a little lazy.
Here is how you begin when you use instant yeast. Put warm water, yeast, sugar, salt, and butter in the mixer bowl and add a cup of flour. Using the whip attachment, mix thoroughly, scraping down the sides of the bowl occasionally.
If you use active dry yeast, dissolve it in a small amount of warm water with a little sugar before adding it to the mixing bowl. Add two more cups of flour, one at a time, and beat well. Keep the mixer draped for the next step.
Switch to the dough hook and add flour gradually until the hook starts pulling the dough away from the sides of the bowl. Stop the mixer from time to time and feel the dough. If it's still sticky, add a tablespoon or so of flour at a time and resume kneading with the dough hook.

Stop adding flour when the dough is soft but handles without sticking to your fingers. Great bread dough should feel satiny and elastic. Remove the dough hook and gather the dough into a ball.
Oil or spray the bowl generously with non-stick spray and return the dough to the bowl. It's not necessary to wash it before you do. Smooth a little cooking or olive oil over the dough, cover the bowl with a dish towel, and set it in a nice warm place to rise for about an hour. When the dough doubles in size, shape it into whatever you want.
After shaping, the dough needs to rise again until it doubles in size, and this second rise will take less time than the first rise.
One batch of this basic "make anything" yeast dough will make two dozen cinnamon rolls or dinner rolls. Or you can make two dozen breadsticks or about sixteen Runzas. It will also make two standard-size loaves of bread, so you have many options!
Here's that runza recipe for you!
Authentic Nebraska Runza Recipe- Classic Russian-German beef and cabbage-filled sandwiches. I think it's more like a hand pie than a sandwich. It is a delicious hand pie with a buttery beef and savory cabbage filling lovingly baked in a pocket of yeast dough—a Nebraska classic.
These freeze great! Make a batch and take out as needed. Warm them up in the oven or microwave!
The cloverleaf rolls in the picture are a little bit tedious and fiddly to make with yeast dough, but a favorite for all the folks who love tearing each one into three pieces and adding lots of butter and Homemade Peach Jam. 😍
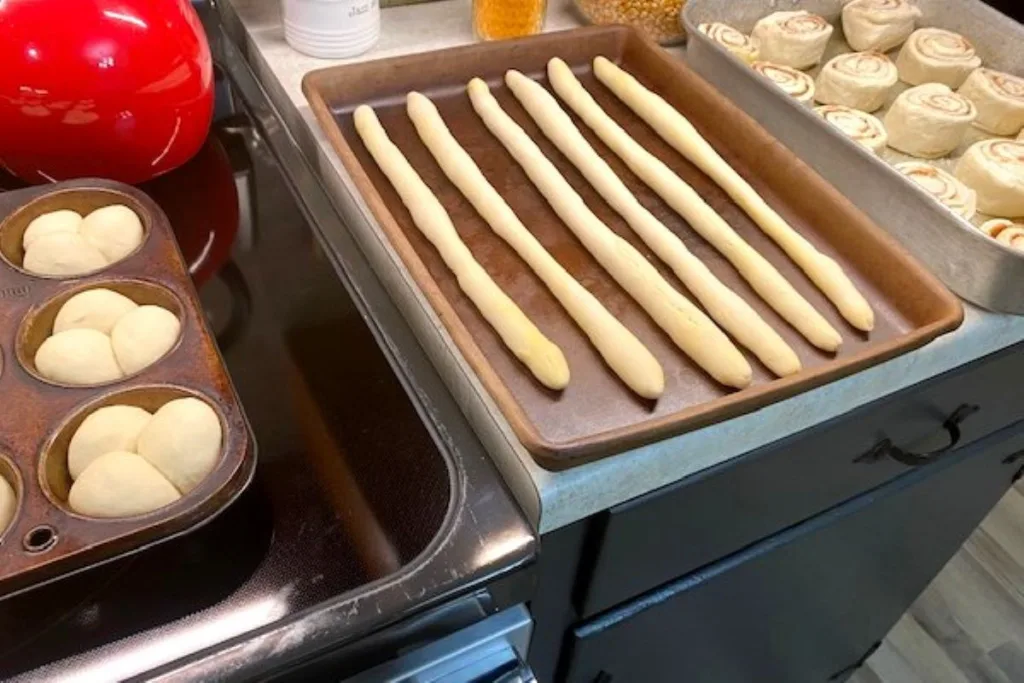
This picture was taken on a baking day at my house. Breadsticks have long been a favorite with our six grandkids. When they were little, the grandkids used breadsticks as swords and then ate them!
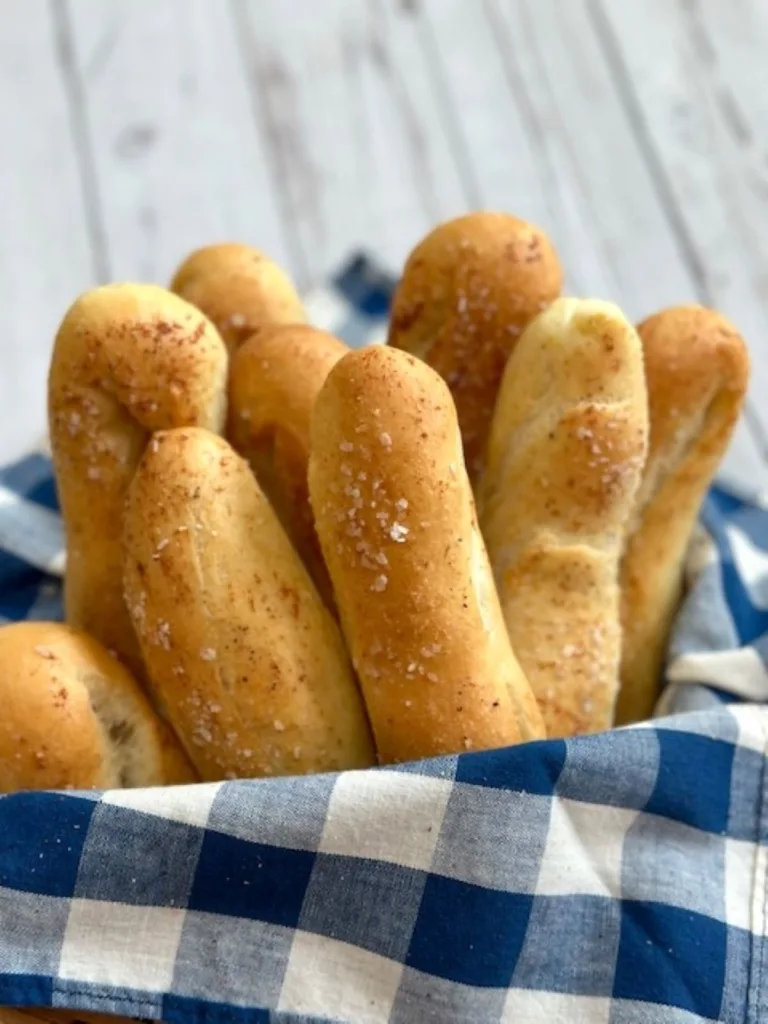
Brush the breadsticks with melted butter mixed with garlic powder before baking, and sprinkle with kosher salt.
When they come out of the oven, brush them with the garlic butter mixture again while they are still warm. The result? Breadsticks- we think they are even better than the ones at Olive Garden. You will make them again and again!
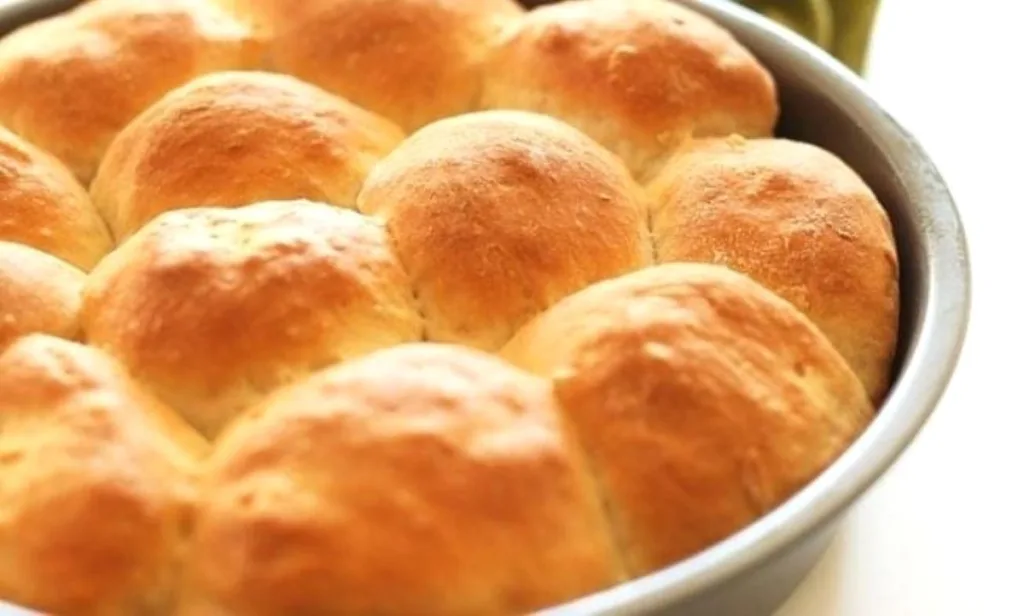
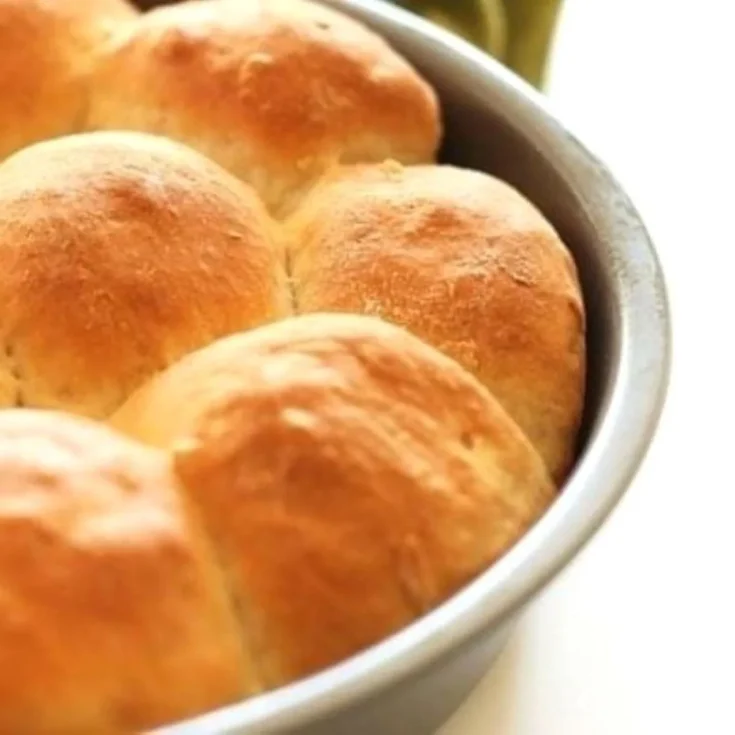
Plain pan rolls, like the ones pictured in the round pan in the first photo, are great to serve with soup or salad. If you like, brush with melted butter, then sprinkle Parmesan or herbs on top.
No Christmas at our house would be complete without at least two pans of cinnamon rolls with brown sugar glaze and a mountain of crisp bacon. Cinnamon rolls taste amazing with chili! It's a very Nebraska thing to do, but don't knock it until you've tried it!
Here's that Beer Chili recipe, too! It makes a mildly seasoned family-style chili recipe that's easy to make, reheats, and freezes beautifully!
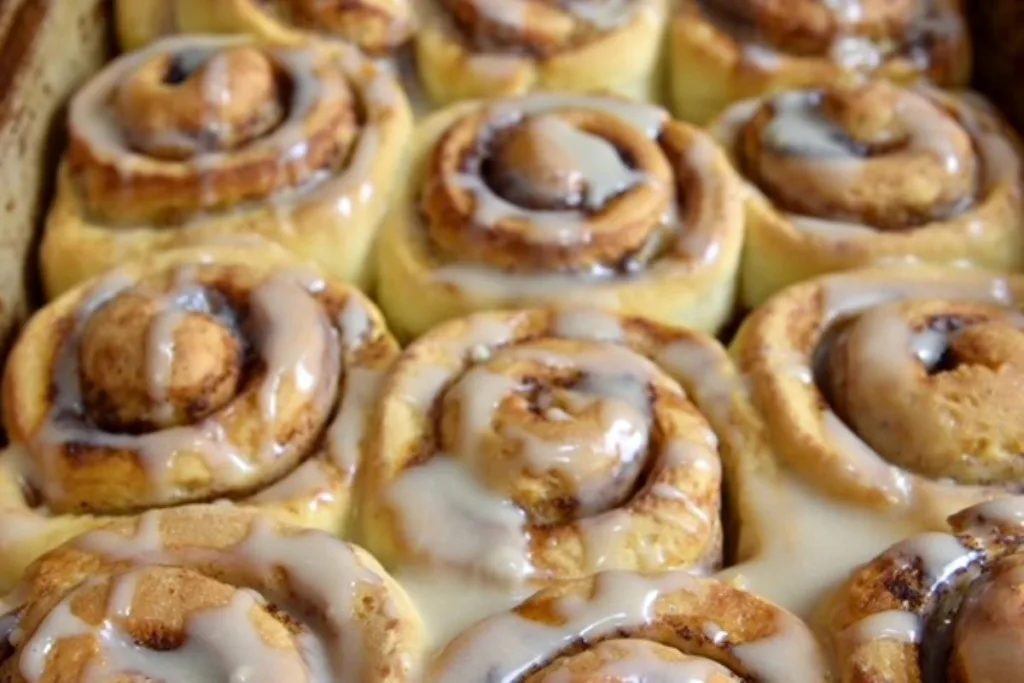
Easy Cinnamon Rolls- I've been making this exact recipe for over 25 years!
A very basic, easy white bread yeast dough you can use in many ways.
It is by far easier to make the dough with a stand mixer fitted with a dough hook. (But if you want arms like Jennifer Aniston, mixing and kneading the dough by hand might be your jam.)
Yeast bread doesn’t have to be intimidating. This basic dough is reliable, budget-friendly, and well worth the effort — especially when it fills your kitchen with that unmistakable smell of fresh bread baking.
Before I go, I just thought of two more cozy recipes you might enjoy!
Hamburger Noodle Hotdish - Here's a speedy, simple one-pan hamburger noodle hotdish. It's delicious comfort food in a hurry. Easy enough for weeknights.
Old-Fashioned Cabbage Soup -Here's a hearty cabbage soup with sausage that you can make in less than an hour with simple ingredients. So packed with yummy flavors, this is a great comfort food!
If you enjoyed a post, I'd love it if you left a review or comment. It helps my little business reach other cooks just like you! ❤❤
Love, GB (Betty Streff)
Real food. Real kitchen. Real easy.
Sign up for my newsletter and receive a free gift! A printable sign that would look great in your kitchen, framed above your sink, or just placed anywhere to remind us how lucky we are to have dirty dishes!
 Sign up now!
I love to bake bread and it’s so over priced at the store. Can’t wait to try this recipe. Thank you for sharing and the hints were very helpful.
I am so happy to hear you want to try bread baking!! It is so satisfying and a huge money saver!! Bless your heart! Here's an even easier way to make a fabulous loaf of artisan-style bread with no kneading at all! It's amazing!!https://gbskitchen.com/how-to-make-a-rustic-bread-loaf-for-pennies/
Thanks so much for taking time to comment! Happy baking!!
Made bread for the first time in my life on a whim and it turned out perfect and husband approved! gave me a great confidence boost in the kitchen (even with having to hand knead without a stand mixer!)
You totally made my day!! THANK YOU for taking the time to tell me!! I made bread by hand for thirty some years before I got a stand mixer- it is still the most satisfying way to do it and I am jumping for joy that it worked well for you!! It will feel more an more natural the longer you do it!!
I used to bake bread with frequency when my kids were small. I haven't done it in years! Today I am going to use this recipe to make an Italian treat my family used to enjoy.Wrap dough completely around cooked Italian sausage links. Bake until golden,then remove from the oven and apply an egg wash (egg beaten with a small amount of water). Return to the oven until egg wash is set and bread is shiny and golden brown.Serve by smothering bread with "spaghetti sauce" and Parmesan cheese. Delicious!
Jenie, thank you for sharing! Your description is so perfect I can taste it! I am going to try it!! I love "grammyrabbit" 💖 i bet your grandkids adore you!!
I'm new to bread baking, I don't yet have a stand mixer.. is there any special way to knead the dough?
I did it by hand for years and it feels so Pioneer Woman! 🥰 I found this youtube video for you! https://youtu.be/BJiucv88flM?si=YVoPbe0huWjAhn9C
Best of luck, my friend!!
I’m planning on making this recipe and I was wondering if you use all purpose flour or bread flour for it? Does it matter? Also, do you have approximate bake times for the loafs of bread— I’ve never baked bread before so I don’t even know a ballpark estimate.
HI and congratulations on baking your own bread from scratch! You go, girl. If you have all-purpose flour, don't go out and buy bread flour. The only difference is that bread flour has a somewhat higher gluten content, which makes bread rise a little better. I used regular flour for the first 30 years, and no one complained!! LOL.
One batch of dough will make one standard loaf of bread, about a pound. If you make the dough into a loaf and put it in a bread pan, usually about 9" by 5", it will take 30-35 minutes to bake at 350 degrees. Test for doneness by tapping on the crust. The bread should sound hollow. I always like to brush the top crust with some melted butter- pretty and tasty! Good luck! Let me know!! ❤
Loved this recipe even though I haven’t attempted yet here in Colorado. Any suggestions for baking at 8600 ft? I know there are some tweaks I should consider for high altitude baking!!! Loved the idea of a warm car to proof dough, but I have to be on the look out for bears. Bet they love yeasty yummy bread too🤣
Great question, friend! I've never lived anywhere higher than Nebraska and Iowa- definitly a flatlander- so I had to get some advice. At 8,600 feet, baking bread needs a little mountain magic. Yeast rises faster way up there, so you’ll want to cut it back just a bit — about a quarter less than my recipe says. Watch your dough closely; it might be ready to punch down sooner than usual, because it also rises faster. You may also need a splash more liquid- like maybe 2 tablespoons (that dry air!) and bump the oven temp up 15–25 degrees to help the loaf bake and set up before it gets too puffed. Hope that helps. I alwyas say homemade bread is cheap to make and it's well worth experimenting a little to get it right because homemade bread is such a joy!! let me know how it goes!
Do you have a guides for how long to bake each item?
What a smart question. On my website, I have separate recipes for runzas - about 20 minutes 350 degrees (the dough is thinner), cinnamon rolls- about 25 minutes at 350 degrees.
Breadstick 350 degrees- about 15 to 20 minutes. What to watch for: Light golden edges and tops, slightly firm to the touch (especially if you want the soft, fluffy kind). Crisp ones may go up to 25 min, depending on thickness.
If you want them a little chewy, pull them earlier. If you want them to have some snap, give ’em a few more minutes.
Dinner rolls:350 degrees 20-25 minutes. What to watch for: Golden brown tops, hollow sound when tapped, internal temp around 190°F if you're being precise. If they look done but feel a little too soft, leave them in 2–3 more minutes. Underdone bread looks fine—until you bite into it.
Every oven’s got a mind of its own, so start checking a few minutes early. I was raised to TRUST MY NOSE and peek through the window — if it smells like warm heaven and looks golden, you’re getting close!
I also like to brush the tops of bread, breadsticks, runzas, and dinner rolls with some butter when they some out of the oven- such a pretty shine.
Oh and we didn't talk about a loaf of bread. One recipe will make two standard loves. Bake at 350 for 40-45 minutes, or until the loaf sounds hollow when you tap on it or you poke an instant read (meat) thermometer in it and the internal temp is about 190 degrees.
Does this make one loaf or two? If two can I cut the recipe in half for one loaf?
yes or you could bake two different things and freeze one- sure!
i do not have a stand mixer and thus no dough hook.
i have made bread in the past (mainly from "uncle john's original bread book", i'm pretty old) so i know how to knead by hand - but could you give me some idea HOW LONG to knead for your recipes?
and also a guesstimaste of how long i should stir the ingredients together (by hand) before kneading?
thank you -
Oh Anne I am feeling terrible! I went back through my comments to find something and realized that I've replied to everyone but you and I don't know how that happened. I am so terribly sorry! In answer to your long overdue question if you've already baked bread there's nothing significantly different about this recipe. I would add flour and stir until it looked like I couldn't add more flour and then turn it out onto a board and knead it by hand until it takes on that nice elastic quality and the dough feels like a baby's cheek - I think you know more than you give yourself credit for and I'm sure if you've tried it it turned out just great and seriously I answer every comment myself and never miss one I think in my 8 years this may be the first time I haven't replied and my deepest apologies. Ack!!
Very novice bread maker here…does this dough need “knocked down “ after rising the second time like I’ve seen in other recipes? And does this recipe make two small loaves or just one?
-Thank you!
I'm so glad you are trying to embrace yeast dough! You will save lots of money making your own bread and rolls and have a beter product! I have to giggle at your term "knocked down" because I've always heard it said "punched down" same thing I get it but no you do not have to allow this dough to rise a second time or punch it down. 😉 One batch of this dough will make a standard 1 LB loaf- I usually use a loaf pan that is 9 inches by 5 inches but you can certainly bake it into two smaller pans. You can also make 1000 cinnamon rolls from this recipe or one dozen or more dinner rolls depending on how you shape them my best advice is don't be afraid to experiment because the ingredients are cheap and even not so great bread is better than store bought bread! keep up the good work- I am happy to answer questions! If you find yourself in a pinch for time and can't get the bread or rolls shaped when the dough has risen, you can punch it down and let it rise again- the second rise will take less time.
This is a great and easy recipe for bread dough. I used it to make Pasties, bread,cinnamon rolls etc. I makec it gluten-free because cant have wheat. It turned out great! Thank you for an easy to make dough.
I am delighted that it worked for you! Please tell me what flour you used- I have a granddaughter who has to avoid gluten. This would be a great discovery because I
have never tried making them gluten free.